How to Build a Web Form with Address Lookup
Melissa UK Team | Address Search, Express Entry, United Kingdom
As you have probably noticed, building a web address form has almost become a compulsory element for all websites that have a checkout procedure, quotation process or simple customer registration.
This blog leads nicely from what we covered in our previous blog about why addressing intelligence is vital for business in today’s digital age where we highlighted the importance of addressing data. We now turn our focus on how to create an address form for your website, which will incorporate the use of address capture tools, also known as an address lookup or address autocomplete.
This delivers a quick and easy way for users to find their full correct address at the point of capture, similar to a search engine; while at the same time, it allows retailers to store accurate addresses in their database, on a global scale.
Below is a step-by-step guide on how to build a generic postal address form which will be powered by an address validation API.
STEP 1: Design for functionality
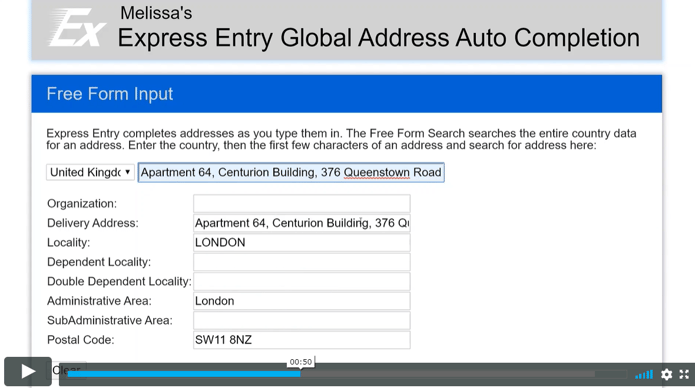
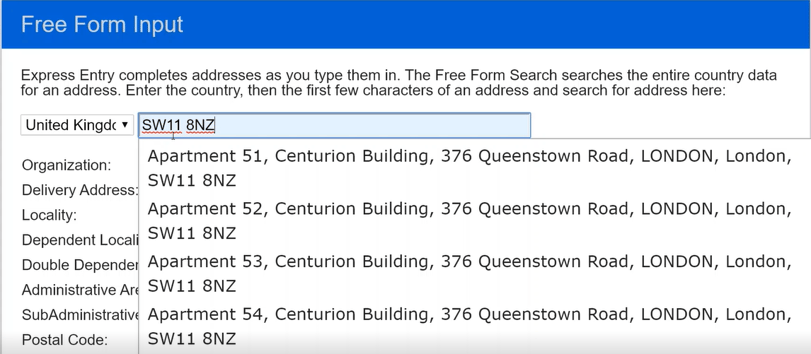
When it comes to design, you need to think about what your users are going to type in first after their full name. In the UK, to identify a full address, all you need to enter is the postcode, which will unfold a dropdown list of full valid addresses. An example of this is below.
In some cases, depending on your country of origin, the postcode may not even be necessary; the address checker can work to suggest postal addresses as you enter the first line of the given address field. See below an example of an international eCommerce store using such a service.
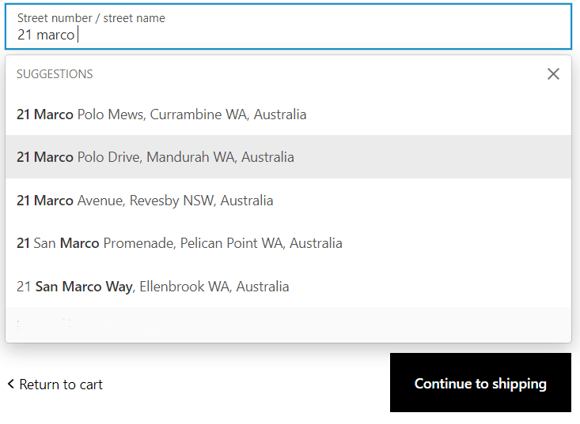
When designing your form it’s important to place this suggestion method at the top of the address form, so the address lookup functionality can work to its full extent to populate the rest of the fields below. This ensures the user saves time on keystrokes and doesn’t have to complete the form manually, only to scroll down to select the right address.
In some cases, there may not be any matches or relevant address suggestions, so there are two things you do, 1: ask the user to check their first line address or if they entered an incorrect postal code, or 2: have them enter their address manually.
STEP 2: The Layout
Now that we have the functionality element of your web form sorted, we move on to the initial layout of the form. Whether it’s a local website in the UK or an international eCommerce store, it’s vital to present your address format in a way that’s recognisable within the markets you operate in. Also, not only making sure that the address is filled out correctly and is accurate but having your database populated with the correctly formatted data for all countries and territories, will ensure no issues when there is a need to use it for communications or promotional activity.
The below image shows the field order which is used on most web forms.
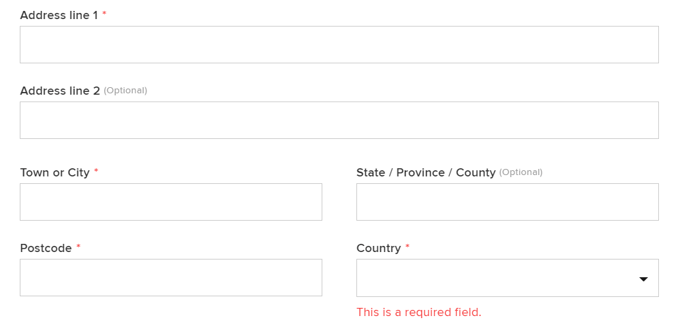
As the country is entered, the code should be implied so the postcode field automatically changes to e.g. ZIPCODE if it’s America, and so on.
Enter address manually
As mentioned already, there should always be an option to “enter address manually” depending on how your address fields are displayed. It’s helpful to have this option just in case the user is having trouble with the autocomplete process or simply can’t find their suggested address
Field lengths and mandatory fields
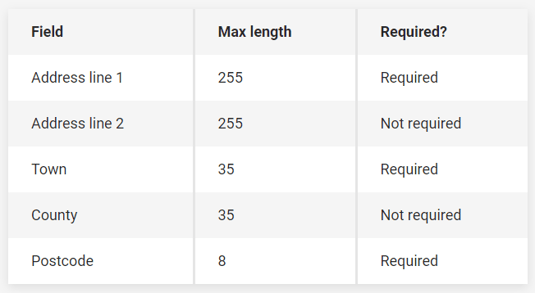
It’s also good to acknowledge that although a state, province, country and even company name may be optional, or not required, it’s still good to have them featured in your form layout, to enable you to easily segment customer groups or leads within your region.
Use the mandatory field length, highlighted in the graphic below, to ensure your underlying data structure has the capability to store your address data.
STEP 3: Local & Global formatted addresses
As well as making sure you have the correct field layout for successful address database input, it’s also crucial to be aware of the types of addresses you will be receiving. This is so your web form can display different formats of address inputs, on a local basis. For instance, UK addresses can come as short as three basic lines, to almost a paragraph full display.
Here are some examples below from Royal Mail’s (PAF) Postal address file
Short:
Elba
Duns
TD11 3RY
Longest:
Isle of Man Government Office of Human Resources
Learning Education and Development
The Lodge Education and Training Centre
Braddan Road
Strang
Douglas
ISLE OF MAN
IM4 4QN
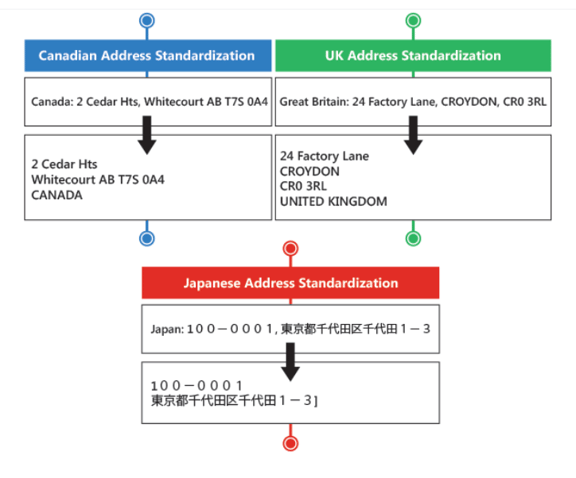
On an international basis, global address standardisation plays a crucial element as each country has its own formatting rules. This reinforces the need for an effective address verification tool embedded in your web forms so that you can process these inputs, and successfully outlay the output to the correct international address format.
Here are some examples below:
STEP 4: What API works best for your users?
Depending on what works best for your users, a local UK web form can benefit best from a Postcode input API, as it provides the fastest way to fill in a UK address. This is due to the average of just 16 addresses assigned to every postcode.
However, as many websites have a global reach, address autocomplete also known as express entry or address lookup, can be more beneficial. Just type the first few letters in the address field it offers a good flow for predictive data entry. This is especially beneficial for users on mobile devices, due to the limited screen space and smaller-sized keys which can cause spelling errors.
You can find out more about webform user experience via our blog: Address Autocomplete: More Conversion Rates
If you are looking for a complete address autocomplete & lookup tool Melissa data have an all-in-one solution to power your webforms and CRM entry, guaranteeing that only correct and verified address data enters your systems.
Learn more with our address autocomplete demo listed below:
